Adsense

Showing posts with label Food knowledge. Show all posts

Sunday, July 10, 2016

Shopping at Kwong Cheong Thye - Where to locate Moon cake Paste / Moon cake ingredients, Sichuan Pepper, Osmanthus in Singapore

After reading some really good reviews about the shop on the Moon Cake ingredients, I decided to explore the shop in Geylang during my trip to Singapore.

The shop is operated from Monday to Saturday from 9.30am to 5.30pm.

It is easy to walk to the shop once you reach Aljunied MRT station. According to the google map, it is a 5 minutes walk.

How to go to Kwong Cheong Thye via Aljunied mrt station


I have a good first impression of the shop, they do have various moon cake paste, the moon cake ingredients, mold and packaging. It is a good 1 stop shop if you would like to obtain all your moon cake ingredients.

The moon cake paste start with 1kg. I have tried to ask for smaller 500gram packaging however it was not available. The sales mention that the smaller packaging would normally be available close to the moon cake festival period.

In addition, to their moon cake paste, they have a wide array of their home brand soya sauce and paste for cooking. I finally found my Sichuan pepper which I had search high and low for this spices - I could include this herbs in my Salted Egg recipe next time!

Below are my shopping haul. Others shop for cloths and beauty products and got excited, while my excitement comes from buying special or hard to find ingredients =P

Cost about SGD60++ . I had to get the black sesame seed as it smells so good. I also bought 2 types of dried orange for my exploration later.

Moon cake paste - Low sugar White Lotus Paste and Low Sugar Green Tea Paste - Cost about SGD16-17 each

Though my intention was to buy moon cake paste only, I ended up buying the Light soya sauce and Cili Paste. Separately during my trip, i also bought the Rice Viniger from Korean Shops

Osmanthus, Dried Orange Skin, Sichuan pepper

Sunday, November 28, 2010

Making Homemade Vanilla Extract and Vanilla Sugar!

 I am so excited making Vanilla extract and Vanilla sugar! KT and Na found the recipe from The Little Teochew and I have anticipate the day that I get all the ingredients, bottle and try them out! My mum always nag when I add in too much artificial Vanilla extract into my dessert. Therefore by creating my own Vanilla Extract I no longer have to rely on artificial Vanilla Extract!


How to make Vanilla sugar
- Just mix the sugar and Vanilla pods

How to make Vanilla extract
-Mix Vodka (35% alcohol) with Vanilla pods (seeds remove). If seeds were not remove will create a mild Vanilla extract. The longer you keep the Vanilla extract the better it will be!

When using the vanilla seeds, just take out from the vanilla sugar. Wash and dry the pods. Split it and remove the seeds. The Vanilla pods can be recycled and dump into the vanilla extract!

 Day 1 of using Vodka + 2 split Vanilla Pods. At first I didnt scrap out the seeds and have to dig them out and split them.
 Day 1 of Vanilla Extract and Vanilla Sugar
Day 5 of Vanilla Extract. Look how the colour has change!

Related post:
How to split the Vanilla pods and remove the seeds?

Thursday, November 4, 2010

Improving my cheescake cooking method~

After reading some information and watch youtube about making a perfect cheesecake, I decided to change the method of cooking the cheese cake. The recipe is still the same. After reading some tips I decided to implement some of them and experiment the difference.

1. First I line my springform pan with aluminum foil. Next round I will try to line with baking sheet.
How to line the springform pan.
Tear a huge sheet of aluminum foil. Open your spring form pan. Put the sheet on top of the pan (the plate of the pan). Lock your springform pan. Now pull the side of the aluminum foil upwards (Make sure the sheet is big enough whereby it also cover the sides of the springform pan). I belief by lining it, the batter will not spill and also cause I will be soaking the whole pan into another big round pan filled with water. Due to soaking into another pot of water, I put a second layer of alluminium foil and cover outside of the pan just to make sure there is no leakage.

2. I press the crust down and make sure they stick firmly to the bottom of the pan. I still bake the crust as per normal.

3. Once the cheese cake mixture is ready. I pour boiled water into the bigger pan in the picture and put the smaller cheese cake pan into the bigger pan. This encourage even cooking in the cheese cake.


Left picture is the new method. Whereby the cake will stick to the side. I have already use a knife to loosen the side before unlocking the pan.
Right picture shows the old method. The cake will not stick to the side.


4. I notice a few difference when cooking it submerge in water from another pan.
- The cake does not rise. As you can see from the picture, the side and the center is the same height. The cake may look visually smaller as a result. The old method the cake will rise while cooking and deflate again when the oven has been switch off. As a result the cake's height is uneven from the side and center.
-New method wise the cake will stick to the side of the pan. Once it is cook I have to use a knife and detach the cake from the side of the pan. Else the cake may crack. I didn't notice this until the next day after taking out of the fridge. Luckily my cake didn't crack. The old method result in the cake shriveled away from the side and I do not have to use knife to detach it from the side of the pan.
- Check the side of the cake of both old method and new method. New method the side look beautiful while the old method side has been brown.

Cake side is beautiful. You can see the difference in color from the crust and the cheese. Height of the cake is even from the side to the center. Result in cake looking shorter.


Old method: Cake has been brown at the side and you cant see clearly the crust and the cheese color. Further the cake is uneven in height

New method
Overall the new method win in term of outlook and color. The cake height look a bit short compare with my last cake. Next round I will experiment with a smaller spring form pan of 8inch instead of using 9inch. Also by putting a layer of aluminum foil, the spring form are more securely lock. There was once I pour the whole mixture into the pan and the pan gave way with the mixture spilling all over (old method).

Latest update:
2nd experiment: 
-I tried using the baking sheet and I will never try it again. The baking sheet absorb the oil/water and tear easily when I tried cutting the cake. The aluminum foil is still better.
-Make sure the aluminum foil is the biggest size type - that can cover the entire side of the spring form pan. Else water may seep in when the spring form pan soak in hot water within bigger pan.
-Make sure the water in bigger pan is boiling hot and that it cover at least half of the inner pan height. Be careful as it may be tricky trying to move the pan filled with water into the oven and insert a smaller pan filled with cheese cake filling.
-Tried using a 8inch spring form pan. The cake turn out softer and height is higher. Cake turn out softer could be due to combination factor above: baking sheet, small aluminum foil, water not boiling.
  
Related Links:

Where to buy Matcha Green Tea Powder in Singapore?

I have hunted high and low for this elusive ingredient to make Green Tea ice cream. I have never bought any green tea before in my life. I did not realize there were so many types of Green tea in the market. The first packet that i bought is a Japanese style Green Tea leaf (SenCha)! I was so dismayed but cleverly taught that i can just use my food processor and grind the tea leaf into powder form. I had to learn it the hard way whereby the tea leaf just will not blend with the chilled whipping cream. On my next purchase, I taught I have bought the right green tea because the packaging shows a powdery green tea picture. However I still bought the wrong green tea. When i open the packet instead of powdery texture, i can see round small balls. Apparently its the "compact" version of the usual Green Tea. My hunt continues despite going all over JB to find at Cold storage/Jusco/City Square/Giant and Kota Raya. I also tried looking at Cold storage Sg but it was sold out at the time.


Where i bought my Matcha Green Tea Powder in Singapore?
I drop Meidi-Ya and Carrefour a mail. Meidi-Ya replied me the next day while there was no reply from Carrefour.
I find that Meidi-Ya has great service. When they reply my email they mention the product name in Japanese language and even inform me the price. I took a photo of the mail and show it to the Meidi-Ya customer service and a lady lead me straight to the product. I will definitely buy from them again!

Meidi-Ya: Matcha Green Tea Powder/Maruyu  Omacha Powder  30g  $12.00

Singapore: Carrefour definitely are not selling Matcha Green Tea Powder. Cold storage also sell Matcha Green Tea Powder

More Matcha Green Tea spotted (Latest Update)

$8.65 at Meidi Ya Liang Court

 This pic look familiar to you? thats coz I bought this for my Matcha Green Tea Ice cream~! The smell of the tea is nicely fragrant~! $12 at Meidi Ya - Liang Court


 $6.30 at Fair Price

All the price of the Match Green Tea varies. Some may not be 100% pure matcha green tea (according to my sis). According to the Matcha Green Tea ice cream youtube video that I saw, the lady advice that it is best to invest in a good matcha green tea powder. If you find matcha green tea anywhere in Singapore please leave comments. If you have tried any matcha green tea including the one I posted above pls comment on their quality too.


I am currently using Ten Ren Match Green Tea Powder. It is cost efficient and produce reasonable result. Sold at Purple Cane or selected major supermarket. 7.93oz for less than RM30 (Malaysia).


Friday, October 15, 2010

Cheese cake making knowledge and toppings

Post taken from suite101. I find that this post is rather useful in understanding cheese cake making.

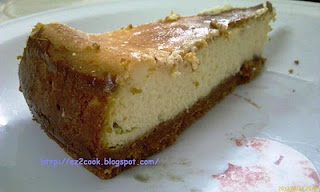
Tips in making the Perfect Gourmet Cheesecake:

-The most common complaints about making cheesecakes is that they're hard to make and tend to crack. Here are some suggestions to help make the perfect cheesecake.
- Ingredients: Make sure all ingredients are at room temperature.
- Mixing: Do not over mix. Too much air in the batter causes bubbles that can cause cracking. Mix just until creamy and all lumps are gone.
- Baking pans: Springform pans are the easiest to use for cheesecake. Take the pan apart, line the bottom plate with aluminum foil, then reassemble the pan. Pull the excess foil up and around the pan to prevent any batter from leaking into the oven. Spray sides and bottom with vegetable spray.
- Baking: Put a cake pan of hot water in the bottom of the oven. Not all cheesecakes get baked at the same temperature. What does matter is that fluctuations in temperature can result in unsightly cracks. Resist the urge to open and close the oven door while baking. It is hard to tell when a cheesecake is done and you don't want to over bake it either, which again causes cracks. The cheesecake is generally done when the sides are set and a little puffy and the very center is slightly wiggly.
- Cooling: Cool slowly on a wire rack away from drafts and at an even temperature for 2-3 hours. Some people lay a piece of paper towel over the cheesecake (not directly on it) to keep in some of the moisture. Run a sharp knife around the sides. Leave cheesecake in the pan and refrigerate for at least 8 hours or overnight. Run a sharp knife around the pan once more before releasing sides. Peel the foil off the underside of the pan, gently lift the cake with one hand and peel off the foil sliding the cheesecake onto a serving plate.
- Rescue: When all else fails, and you end up with an earthquake size fissure down the center, there is still hope. Fresh fruit and pie fillings, frosting, glaze, cookie crumbs and ganache can always cover a multitude of sins and your guests will never know the difference!
- Freezing: Cheesecakes freeze great so why not make two! Double wrap with plastic wrap and freeze for 2-3 months.


NY Style Strawberry Cheesecake Recipe
Graham Cracker Crust:

    * 1 1/4 cup ground graham cracker crumbs
    * 1 Tbsp sugar
    * 4 Tbsp melted butter or margarine

Cheesecake Filling:

    * 4 packages (8 ounce each) cream cheese, softened
    * 1 1/2 cup sugar
    * 1/4 cup cornstarch
    * 1 Tbsp vanilla
    * 2 large eggs
    * 2 egg whites
    * 1/2 cup heavy cream

Directions:

   1. Preheat oven to 350 degrees F. Place pan of hot water in bottom of oven.
   2. Prepare 9 inch springform pan with foil and spray as directed above.
   3. Grind graham crackers in a food processor or crush very fine with a rolling pin.
   4. Mix crust ingredients and pat only on the bottom of prepared pan.
   5. In a mixing bowl on medium speed, beat cream cheese until smooth ~ about 3 minutes. Scrape down sides.
   6. Add sugar and cornstarch and beat again, scraping a few times. The mixture should be smooth.
   7. Add vanilla, eggs and egg whites 2 at a time. Beat until creamy.
   8. Slowly add the cream and beat only enough so there are no lumps and the filling is nice and fluffy. Scrape as needed.
   9. Pour batter into prepared pan and bake at 350 degrees for 60-70 minutes.
  10. See above for further baking, cooling, serving and freezing instructions.
  11. Sour cream topping variation: see below
  12. Refrigerate any leftovers.
  13. Serves 14

Sour Cream Topping:

    * 2 cups sour cream
    * 1/2 cup sugar
    * 1 Tbsp vanilla
    * Mix all ingredients until smooth and sugar is dissolved.
    * When cheesecake comes out of the oven, carefully pour sour cream mixture on top of cheesecake.
    * Return cheesecake to oven immediately and bake for another 10-15 minutes or until set.

Whole Strawberry Topping:

    * 1 quart fresh strawberries, washed and hulled
    * 2 cups seedless strawberry jelly, apricot jelly or currant jelly
    * This cheesecake calls for only the most beautiful, red-ripe strawberries you can find.
    * Make sure cheesecake is completely chilled.
    * Pat whole strawberries dry with paper towel. Stand up, cut side down in a pleasing pattern.
    * Heat jelly or glaze until runny, not too hot.
    * Carefully spoon or brush glaze over strawberries.
    * Return to fridge to chill before slicing.

Strawberry Topping:

    * 1 quart fresh strawberries, washed and hulled
    * 1 cup sugar
    * Puree half the strawberries and the sugar in a food processor. Remove to a bowl.
    * Add the remaining 1 cup whole strawberries, stir and let sit for 30 minutes.
    * Spoon over cheesecake slices before serving.
    * This can be made ahead and refrigerated. Use on top of ice cream too!

Raspberry Topping:

    * 2 cups fresh raspberries
    * 1 cup sugar
    * See above topping directions.

Thursday, October 14, 2010

How to make a good Chicken stock?

I made my chicken stock from following recipe taken from shiokfood.
I made the chicken stock and use it in the Tom Yam recipe and the soup turn out delicious!  A lot of soup needed chicken stock so its a good idea to make a big pot and store the rest in the freezer when you want to make other recipe.

Good chicken stock is very simple to make. Take 1 kg chicken wings, throw in a couple of drumsticks for meat, put it in a tall stock pot, cover with 2 litres cold water, and bring to a simmer. When the scum rises to the top, skim to another bowl with a shallow spoon. This should take 10-20 minutes. When the stock is clear, toss in 4 spring onions (scallions; use only the white part), 5-6 slices ginger, and a teaspoon of black peppercorns. Let this simmer for 2-3 hours (it should only bubble). Two rules for good stock: a) do not stir and b) do not boil (or it will become cloudy instead of clear.)

Sunday, May 23, 2010

Philips 2304 Ice cream maker: Why my ice cream failed and tips to succeed?

I churn the banana ice cream in an air condition room to speed up the process. The ice cream is harder than it looks
 
If you have problems with using the Philips 2304 ice cream maker
-Why my mixture does not turn into ice cream?
-Why it does not churn into ice cream?
-Why the before and after is the same and no ice cream came out?
-Is Philips 2304 ice cream maker a fluke?
-Tips in using the Philips ice cream maker

then this post might be able to help you. This post concentrate on how to make the machine work and it is not referring to the taste of the ice cream.


I am bursting with happiness as my Philips ice cream maker is finally producing ice cream! I failed 3 times making the ice cream and just when I am starting to think that the product is a fluke and thinking of ways of getting rid my 1 week old ice cream maker, I finally succeeded in churning out ice cream! The first 3 times fail in the sense that the mixture i put in does not churn into ice cream. The before and  after is the same, the mixture is still in liquid form. And when I wanted to save the mixture by putting it in a container and pop into the freezer, the next day I tried and the ice cream is hard like a rock. Its hard because ice crystal form around it. Just imagine you are eating large ice cube in mango flavor.

Tips in using the Philips 2304 ice cream maker:
-Read the instruction manual page by page. My first recipe is mango ice cream. After figuring out and buying all the ingredients, I skip reading the manual and jump straight to making ice cream. After the second miserable failure I started skimming through the page and start using the recipe in the book.

-Watch out the quantity. To maximize your success rate, I suggest that you start simple and follow the recipe provided when you buy this ice cream maker. That is because when you get the recipe in the net, they might be giving the measurement base on different types of ice cream maker. As you are new, you might not know how to reduce or increase the quantity base on your ice cream maker. If you put too much then your mixture might fail to churn out ice cream.

-Freeze your mixture first. First time I did not freeze the mixture, second time I put in the freezer for a while, 3rd time I cook the ice cream mixture and put for 2 hours. Fourth time I put a non cook ice cream for 1 and half hour.

-Freeze the cooling disk till its rock solid. In this model, you will need to store the cooling disk till its hard. To ensure it is ready, just shake the cooling disk. If you hear a watery sound means that it is not ready. I find this easier comparing with the manual recommendation whereby "you will hear a crunching sound when you press the bottom of the disc with your thumb". For my freezer, apparently 24 hours might not be enough. The fourth attempt I left it for 48 hours in the freezer.

-Thaw the cooling disk make sure its free of ice. I find this step crucial as i ignore this step the first 3 times. When there is ice stuck on the grey side of the cooling disk, where the stirrer turn, then there will be a weird sound produce. That is because the stirrer could not turn properly and it will turn the cooling disk too. By right the cooling disk should remain still while the the stirrer turn. The fourth time I thaw the ice away carefully with a plastic ruler (please do not use metal utensil as it will damage the cooling disk). Before pouring in the mixture I switch on and make sure that the stirrer is turning smoothly. I stop it to clean the cooling disk as I heard a "wrrrr..tak tak.....wrrrr" which means that it is not turning smoothly. You can start pouring in your mixture once you have check that the stirrer is turning smoothly

-Room temperature. Well this might be a weird method but desperate situation calls for a creative measures. The 3rd attempt onwards, I started making ice cream in a air condition room! It state in the preparation time section in the manual that the mixture will take a longer time in higher temperature environment. I belief this really help to speed things up as I started seeing ice cream appearing miraculourly in less than 20 minutes!

-Dont stop to check your ice cream. On my 3rd attempt, I stop halfway. When i start back there is a weird "tak....tak...tak" sound like something is stuck! The sound is so disturbing that I stop the process, took out my vanilla mixture and realize that the mixture has stuck on the cooling disc

-Watch ice cream making video. It will build up your confidence. There are many ice cream making recipe in Youtube.

-Start simple. If your first few attempt fail its best to start simple. If you have banana at hand, I recommend you try their Banana Ice cream at page 9. Its simple as you don't have to cook it and it does not involve any eggs.

If you still face problem even after reading this post, I recommend that you read the instruction manual and start with a simple recipe. Read the manuals word for word.

Friday, May 21, 2010

What is the difference between heavy cream, whipping cream, light creams, half-and-half and evaporated milk?

As I am starting to make ice cream and cakes, there are many types of cream in the market. Below are some answers on the different type of cream

Taken from VeryBestBaking.com
Topic/Question:  What is the difference between heavy cream, whipping cream, light creams, half-and-half and evaporated milk?

Answer: Varieties of cream are defined by how much milk fat they contain.

      - Heavy cream and heavy whipping cream are different names for essentially the same thing: cream that is 36% or more milk fat, and which doubles in volume when whipped.

      - Light whipping cream is between 30 and 36% milk fat, and can also be whipped.

      - Light cream, table cream, coffee cream or single cream are names for cream that is around 18% to 30% milk fat and will not whip.

      - Half-and-half is a mixture of cream and milk, and contains about 10 1/2 to 18% milk fat and will not whip.

      - Evaporated Milk is canned whole milk that contains at least 6.5% milk fat. Due to how evaporated milk is processed, it will whip for a short time. See Whipped CARNATION Evaporated Milk Recipe.


Taken from Yahoo! Answers
What is the difference between Whipped cream and Whipping cream?

Whipped cream is the stuff u put on dessert. Whipping vream is a thck cream that u can whip using a wisk or blender to make whipped cream. : ) yum

Thursday, April 22, 2010

Weight and Measurement

1 cup flour 120g 4 oz
1 cup sugar 225g 8 oz
1 cup liquid 225ml 8 fluid oz
1 cup oil 225ml 8 fluid oz
1 tablespoon flour 30g 1 oz
1 rounded table spoon sugar 30g 1 oz
1 rounded tablespoon butter 30g 1 oz

Wednesday, April 21, 2010

Chese cake cost break down

How much and where I bought the cheese cake ingredient in Johor Bahru/Malaysia

Kota raya - UO Superstore
1. Lemon 2 pieces. RM2.40
2. F&N Sweetened Condense milk. RM3

City Square
3.Digestive biscuit RM4.50
4. Strawberry jam RM10.30

Cold storage Kerry's
5. Tatura Cream Cheese 500gm RM12.99

Ng Hock Heng
6. Springform pan - RM25

LinkWithin

Related Posts with Thumbnails