Adsense

Showing posts with label Breakfast. Show all posts

Saturday, July 16, 2016

Prezel Recipe - The art of french pastry jacquy pfeiffer


Pretzel Recipe with Cinnamon and Sugar Coating

I have tried this recipe and the outcome is a rather crispy and biscuit texture pretzel. I have tried to follow the recipe as much as I could but I substitute lye water with sodium bicarbonate and flavored the pretzel with sugar and cinnamon. For the lye water substitution, I initially wanted to use Chinese Kan Sui but upon researching on other user comment, I realize that it is not an ideal substitution.

The steps and explanation from the book can be quiet lengthy. Thus I have shorten the steps to the key points.

Pretzel Recipe (10 pieces of Pretzel)
A) POOLISH
Whole milk (3.5% fat) | 90 grams |⅓ cup
Dry yeast | 10 grams | 2½ teaspoons
All-purpose flour | 165 grams | 1 cup plus 3 tablespoons

B) DOUGH
Water | 100 grams | 7 tablespoons
Bread flour | 165 grams | 1 cup plus 3 tablespoons
Butter (French style, 82% fat),  softened | 35 grams | 11/5 ounces (1 tablespoon plus ¾ teaspoon)
Sea salt | 7 grams | 1 teaspoon
Butter (French style, 82% fat), softened, for the pans | As needed | As needed

C) DIPPING
Sodium Bicarbonate 1/4 cup
Boiling water 3 cup

D) COATING -
Melted butter
1/4 cup sugar
1 1/2 tsp cinnamon 

METHOD 
1. Mix the milk and yeast together in the stand mixer. Sprinkle the all-purpose flour over the top. Let sit undisturbed for 10 to 15 minutes. After 15 minutes cracks should have formed on the surface of the flour; this signifies that the yeast is fermenting. The fermentation of the yeast creates a very slight acidic flavor that contributes a pleasant flavor to the dough.

2 Once the yeast has been activated it is time to mix and knead the dough. Adjust the temperature of the 100 grams of water to the same temperature as the milk. Before beginning the mixing process place an extra ¼ cup of water next to the mixer, just in case the dough is too dry. Add the bread flour, water, soft butter, and finally sea salt to the mixing bowl. Mix for 1 full minute on medium speed with the dough hook. The dough should begin to come together after 1 minute; if it does not, add a very small amount of water to it. Mix for 5 minutes on medium; stop the mixer and scrape down any dough sticking to the side or bottom of the bowl or that has risen up the hook. Mix for another 7 minutes on medium, until the dough is smooth and wraps around the hook.

3 Remove the dough from around the hook, shape it into a ball, and place it back in the bowl. Cover the bowl with a damp towel or with plastic wrap and let rest in a warm spot for 20 minutes. 

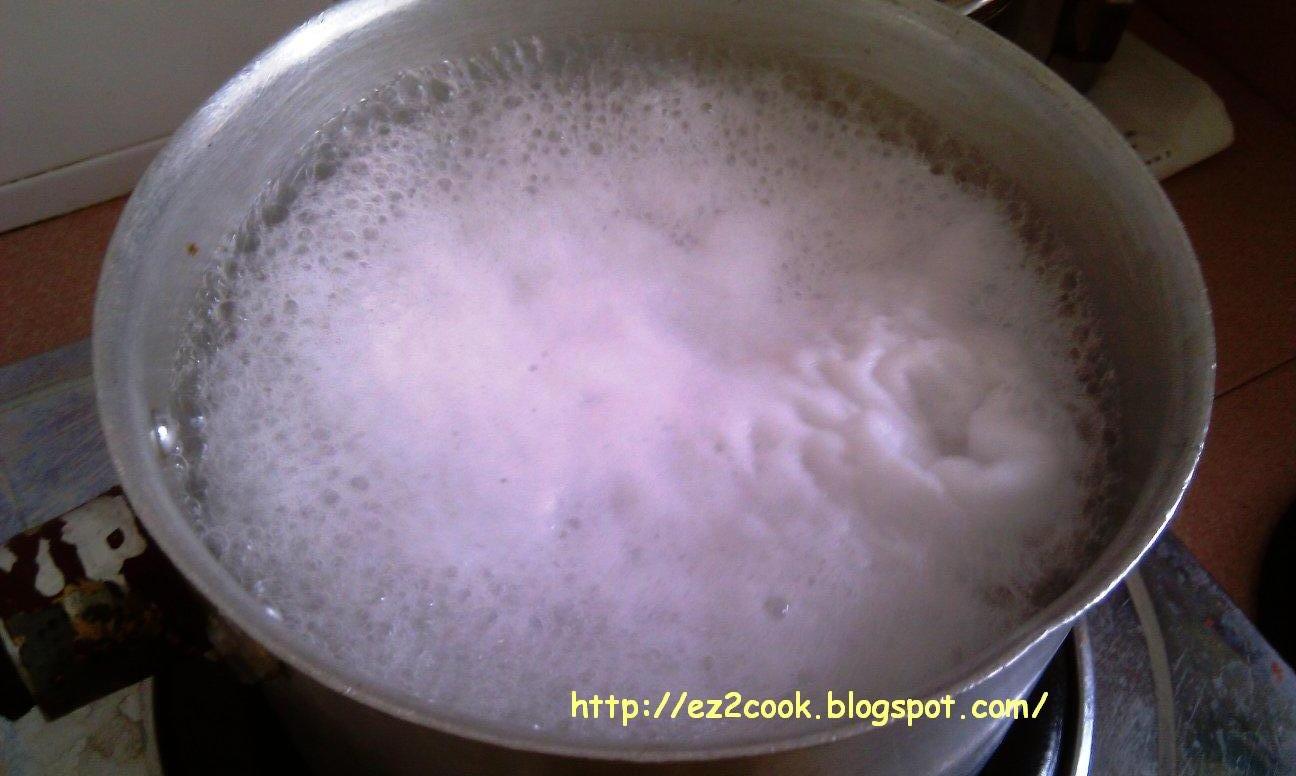
4 Using a whisk, carefully mix the sodium bicarbonate with the hot water in a glass bowl or a plastic container. 

5 After 20 minutes of rest, cut the dough into 58-gram pieces; the next step is to shape them. You should not use flour during the shaping process. Take a piece of dough and fold it over itself to create a ball. Cup the dough and start pressing on it while making clockwise circles. At first you need to press hard so that the dough sticks to the table a little, and then you ease the pressing while tightening the cupping. When the shaping is done you should have perfectly round spheres of dough. Shape all of the pieces of dough into spheres and place them in the order in which you shaped them on the edge of the counter, leaving a lot of space in front of you. When you shape dough into balls, the gluten develops and makes the dough tight; before you continue shaping the pretzels you will need to let the balls rest for 5 minutes, so make sure to place them in order in a row so that you remember which one was shaped first. Cover them with a towel and let them rest for 5 minutes.

6 Take the first sphere that you worked on and roll over it with the palms of your hands to shape into a 3-inch-long log. Set it aside and repeat with the other spheres. Cover with a towel and let rest for 5 minutes. With both hands, roll each pretzel until it is 6 inches long; the shaping has to be done gradually or the dough will rip or shrink back. Repeat with the other pretzel logs. Cover with a towel each time and let rest for 5 minutes. Repeat rolling each log progressively longer, with a 5-minute rest between each rolling, until the logs are 21 inches long. The middle should be slightly thicker than the ends. 

7 To shape the pretzel, with the log lying on the countertop in front of you take an end in each hand, holding with your thumb and forefinger, and draw slowly toward the middle with both hands until your hands are centered in front of you; then cross the right end of the dough over the left. Let go of both dough ends, then take them up and twist the right end over the left end one more time. Fold the twist up toward the center of the circle and attach an end to each side of the round. STEP 3 Twist the right end over the left end one more time. STEP 4 Fold the twist up towards the center of the circle and attach an end to each side of the round.


8 Once all the pretzels have been shaped, dip into the solution. Set in a warm spot to rise for 30 minutes. Meanwhile, preheat the other oven to 450°F/230°C with the rack positioned in the center. 

9 Bake the pretzels for 10 minutes 1 sheet pan at a time. Butter the pretzel with a brush, coat with cinnamon and sugar
5. Shape into a ball

6. 3 inch log

6. 6 inch log

6. 21 inch log

7. How to shape pretzel.

7. How to shape pretzel.

7. How to shape pretzel.

After shaping and dip in the sodium bicarbonate

Baking time!


Home Food Rescue / Mr. Baek The Homemade Food Master -1) Cooking Pancake, Ham and Scramble Egg Recipe 2) Breakfast B s2e13

Pancake, Ham and Scramble Egg Recipe 

 Pancake, Ham and Scramble Egg Recipe 
Or you can eat it in a burger style just like in the Home Food Rescue show

Inspired from the show, I have decided to make Pancake today. As I do not have the Pancake Mix and I could not be sure of the Scramble Egg Recipe, I have modified the steps accordingly.

The recipe below are intended for 2 servings:-

As maple syrup is expensive, you can substitute with the following steps

Make own syrup
Sugar and water ratio is 1:1. As the ratio is 1 to 1,  you may modify the quantity as you wish.
1/4 cup water
1/4 cup sugar brown
Pour both into pan
Cook till it bubble and remove. It look almost like maple syrup color. The syrup look watery when remove from pot but will thicken a bit when it cool down.
(Obtain from Home Food Rescue)

Made from scratch Pancake recipe - Make about 5 pieces of pancake. You may double it if there are more people.

A)
70 gram all purpose flour
1 tsp bake powder
A pinch salt
1 tbsp sugar

B)
96g milk
30g egg
15g butter - melted
a bit of vanilla essence


Prepare A by sifting. Followed by stir in B. Don't over mix. Rest for 10 min.

When serve cut a square butter put at center, put maple syrup
(Obtain from http://www.chocolatesandchai.com/fluffy-fluffy-pancakes/)

Scramble Egg Recipe:

3 eggs
3 tablespoon milk

Assemble:
1. The sequence is prepare the syrup, pancake, scrambled egg and fried the 4 ham.
2. When serve, layer with 1 pancake, syrup, followed by cheese, ham, scrambled egg, syrup pour on the 2nd pancake - poke with fork to quicken the syrup absorbtion.

Breakfast B recipe - 2 person portion
Home Food Rescue / Episode 13 / Breakfast B consist of Stir fry potato with bacon, hotdog, sunny side up and beans

This recipe is versatile and you may modify the ingredient to your preference. It taste great and its highly recommend to try.

Recipe:
2 medium size - I use Australian washed potato. Cut medium slice with skin intact
1 onion - chop small
2-3 slice bacon - slice small
1 large hotdog (or use 2 small hotdog) - cut almost half
2 sunny side up or poach egg
Some green beans or any suitable vegetable

Steps.
1. Put some oil n fry the potato evenly. Flip the potato until each side brown. Season with salt
2. Put in bacon and onion n stir fry. Season with black pepper. Scope out
3. Cook hot dog and green bean and scope out
4. Cook egg and serve.

For shortcut after point 1, I move the potato aside and cook the hotdog. Followed by point 2 and cook the green bean all in 1 pan which can be a bit messy and you will need a large pan to do so. Scope out and either fry egg separately or prepare a pot of boiling water and vinegar to make poach  eggs concurrently.

Both the outcome is yummy and you should try the recipes too!

Tuesday, May 13, 2014

Baking Bread using Rice Cooker Recipe!

Cheese, tomato, basil leave, ketchup sauce, black pepper - rice cooker bread recipe


Rice Cooker Bread Recipe - Before 1st fermentation

Rice Cooker Bread Recipe - After 1st fermentation
Recipe
http://www.wikihow.com/Make-Rice-Cooker-Bread

I have always wanted to make this since I saw this in the anime Yakitate Rice Cooker Bread! It takes some times to make it but once its done, I gain the deep sense of satisfaction. My bread is gone in the same day between 2 people. Its so yummy and great fun. There is something magical about the bread making - my favorite part is to see the bread rise. Due to this magic moment, it inspire me to make more types of bread in the future!

I got the recipe from the link above.

Recipe and steps
A)
5 grams yeast (about 1.25 teaspoon)
1/4 cup water - water has to be at 110 - 120Fahrenheit

B)
350 grams flour (2.5 cups)
21 grams sugar (about 1.5 tbsp)
6.5 grams salt (about 1.5 tsp)
21 grams butter (about 1.5 tbsp)
30ml milk (1 oz.)
180 ml water (6 oz.)

About 5 hours

Mix A and leave it to stand for 10 minutes

Prepare B in a bowl. Once done add in A.
Knead the dough for about 8-10 minutes. If its too wet, you can add flour to the work surface.
Add butter to dough mixture till its fully absorb.

Allow to sit for an hour - Leave the dough at warm area or warm setting.
After 1 hour it will look like the 3rd picture on top. Dont punch the dough. Instead lift the dough up at about 50cm height and throw into your bowl with a certain force until it become like its original rise.
Allow to sit for another 1 hour. This is the second and final rise.
It will puff up and double in size.

Baking in the rice cooker
Every rice cooker is different
Mine is the normal rice cooker with porridge and rice function.
After 1 hour, the bottom look slightly burn but still edible. Flip the bread over and continue baking. Its suppose to take another hour but may be shorter depending on your machine. Mine is about 30-40 minutes on the other side.

My rice cooker will switch from cook to warm by itself. I have to monitor it closely. Every time it switch to warm, I had to press the cook function. Sometimes it allowed me to switch mode, sometimes it doesn't. Nevertheless, the bread was cook at the end. Thus next time when I make this again, I will flip the bread at 50minutes to prevent the burning.

Monday, May 12, 2014

Simple Overnight Oats (No cooking required)

Simple Overnight Oats Recipe

I like making this cause it is so simple, able to make in advance and involve no cooking. Best of all its healthy, versatile and you can make any type of combo you wanted! You can make it with basic ingredients or add all sort of toppings, nuts, healthy oil or dried fruit.

You just need to bear in mind the ratio.
1 cup of oats
1 cup of milk
1 cup of yogurt
Add honey to taste (optional)

Variation that you can add:
Fruits of your choice
Nuts
Flaxseed oil
Dried Fruit like dried apricot, raisin, cranberry

Just mix everything, store in a container of your choice and you can eat it the next day. This doesnt require cooking as the oats will soak up the liquid. I prefer to use Roll Oats. The honey is for those who fear the sourness in the yogurt. I notice that there are people who hate eating yogurt due to the sourness.


Thus far I have not store this more than a day as it wont stay in my fridge for long! This is a great way to start your day as it will be very filling and useful as a quick breakfast takeaway during work days. I store my overnight oats in those old glass jam containers when on the go.

I plan to make more of the home made yogurt on my own to avoid the store bought ones. I highly recommend making this.

Monday, December 31, 2012

Fluffly Pancake recipe


Just made this for the 1st time! It turn out so fluffly and beautiful. This recipe yield about 7 pcs of pancake in a 1/3 cup size.

A) Sieve
125g Flour
6g Baking powder
Pinch of salt

0.5g Baking soda

B)
35g Vegetable oil
175g Milk (or more if batter look dry)
1 Egg yolk

C) Beat hard peak
1 Egg white
10g Sugar

Direction
1. Put A and B together and mix well and lump free. (Much easier to use beater)
2. Fold C into AB mixture. (Use a big flat spatula or big spoon)
3. Scoop and cook in non stick pan. When you see buble on the pancake then turn the pancake.

Eat this with honey and a dollop of butter.

Wednesday, March 16, 2011

Homemade Chocolate-Hazelnut Spread Recipe

I took this recipe from Su Good Sweets

I have some hazelnut which is about less than 100g of the nuts. Quantity is less than 1/3 of the recipe but I decided to make it anyway~! I was curious about the part about the hazelnut oil will come out when there is high friction and heat. Was quiet interesting to really see the nut become tiny bits and when I process it further, oil start to seep out of the nut and become hazelnut butter. The smell of Hazelnut spread is amazing. I was influence to make this when my sis made it herself and recommend it! She wanted to buy Nutella from the supermarket. But when she notice that there is high oil content with lesser hazelnut she decided to make her own Nutella. As usual whatever project she has made has always manage to attract my attention. She found that Nutella hazelnut content is about 18% but this recipe has about 47% hazelnut content.

Actually making my own Nutella doesn't come cheap. A 500g packet of raw Hazelnut itself already cost RM22.50 in Ng Ming Huat bakery shop. Although its pricey I still bought it anyway as I wanted to know how the recipe will work out and its always fun to discover how to make things from scratch. Another good reason to make your own Nutella according to Su Good Sweets blog, she mention that, "As much as I love Nutella, today’s commercial version is actually sugar that’s flavored with hazelnuts and cocoa. You can tell because sugar is first in the ingredient list. And there’s lots of added oil to make it spreadable."

As for my spread, the smell is amazing but the mixture come out a little more watery than I would like. I notice a reader who tried the recipe in the author's blog mention that she only need to add about 1 tbsp oil if we mix the hazelnut long enough to produce hazelnut oil. I will follow the reader advice in my second attempt on the new batch of nuts that I bought.

Ingredient

After spinning a few times. Check out how the hazelnut texture has change and oil oozing out of it.

Once the hazelnut has turn into hazelnut butter, I dump in the chocolate, sugar and oil.

My Chocolate-Hazelnut spread in the jar! Cool and fun project!

Taken form the website:


Chocolate-Hazelnut Spread (easy version)
Yield: about 12 ounces (1 1/2 cups)
2 cups whole raw hazelnuts
1 cup powdered sugar
1/4 cup unsweetened cocoa powder
up to 1/4 cup vegetable or nut oil
1/2 tsp vanilla extract
  1. Preheat oven to 350° F. Place hazelnuts in a single layer on a shallow baking pan. Toast until the skins are almost black and the meat is dark brown, about 15 minutes. Stir the nuts halfway through baking to ensure an even color.
  2. To get rid of the bitter skins, wrap the cooled hazelnuts in a clean kitchen towel or paper towel. Rub until most of the skins come off, but don’t worry if some remain.
  3. Process nuts in a food processor, scraping down the sides of the bowl occasionally, until they have liquefied, about 5 minutes. First, you will get coarsely chopped nuts, then a fine meal. After a little while, the nuts will form a ball around the blade, and it will seem like you only have a solid mass. Keep processing. The heat and friction will extract the natural oils, and you will get hazelnut butter!
  4. When the nuts have liquified, add the sugar, cocoa and vanilla. Slowly drizzle in enough oil to make a spreadable consistency. Since the mixture is warm, it will be more fluid now than at room temperature.
  5. Transfer the spread to an airtight container, and store in the refrigerator for 1-2 months. For best results, stir the chocolate-hazelnut spread before using.

Tuesday, March 15, 2011

Healthy Granola Bar

I got this below post from my amazing sister Shirley who I look up to since she is the queen of DIY at home. She could DIY her own moisturizer, ice cream, nutella chocolate and this round is energy bar. Actually she made this a long time ago and I am posting her recipe now. Hopefully I will be able to find all the ingredients and start on my own soon~!

For those interested in the granola bar recipe:

To make it HEALTHIER,
1)you can substitute part of butter, i did 3/4 butter replacement
with apple sauce (weight for weight)
2)you can replace butter with good oil if you want
eg,
-grape seed oil
-olive oil may be too strong, but i think my sis in law uses olive oil
3) you can replace white sugar with
-raw sugar
-organic sugar
-honey
corn syrup is not healthy but i heard its tasty and used widely in commercial granolas

you can use any dried fruit, just replace as per portion stated below.
you can replace any nuts.. use your imagination
you can replace wholemeal flour (though this is better) with white flour if wholemeal is not available
if you dont have crisp rice cereal.. perhaps u can add bran or just add more flour

good stuff to add:
flaxseed (grinded ones, cos the ungrinded one may just shoot out of your bowel system without being absorb)
wheatgerm- good for you
peanut.. heaty ler.. eat less.. eat more almond.

Wednesday, October 27, 2010

How to make yogurt recipe - the easy way!

Making yogurt is so easy and simple that you should try making them yourself. There is a sense of satisfaction and you can adjust the thickness of the yogurt base on individual preference. Plus by making them yourself, you know what you have put in and may skip store bought yogurt with preservative added. You only need 3 ingredients in making yogurt: hot water, milk powder and yogurt starter. As for utensil its best to use thermos to maintain a consistent temperature to enable the yogurt bacteria to germinate.

Its been a long time that i last made my yogurt. Its actually super easy to make yogurt. I am not sure why they make it so complicated at the website when i google them. Maybe because their weather is different which is why they are complicating the process by double boiling and cooking. My mum advice that I must make the yogurt at night to maximize the chance of the yogurt to succeed.

Ingredient
#Yogurt starter
#Milk powder - about 4 tablespoon each cup
#Hot water
#normal size drinking cup (1-2 cups depending on the quantity you wanted to make)
#thermos to maintain a consistent temperature


Steps
-Pour hot water in cup
-Put about 4 big tablespoon of milk powder into each cup. I like putting a lot of milk powder as I like my yogurt to have a thick consistency. You can adjust the number of scoop you put in.
-Once satisfied with the thickness, wait till the milk become warm. You can test by putting your finger in. If too hot then the yogurt starter bacteria will die.
- Put in the yogurt starter when the temperature of the milk is below 120°F(49°C), but don't let the milk cool below 90°F (32°C). 110°F (43°C) is the optimal temperature. 
-Once warm put in about 1 tablespoon of yogurt starter into the milk.
-Pour all the mixture into thermos. Cap it and leave overnight for about 8 hours at room temperature. If you leave the yogurt outside too long, the yogurt may turn sour. Store the yogurt into the fridge once the yogurt is ready.
 1 tablespoon. I add in about 4 scoop.

The mixture after stirring the milk. You can sieve the milk before pouring into the thermos.

There might be some liquid pooling in the yogurt. Just pour away the water and consume the yogurt like normal. If you have fruits like strawberry or apple. Cut them into small slices and mix into the yogurt. Yogurt is a "cooling" type of food (according to my mum). If you tend to eat heaty food like curry, you can eat yogurt to balance out your diet. However please eat the yogurt in moderation.

Yogurt are versatile. Other than adding fruits into yogurt, you can make yogurt ice cream, yogurt shake and yogurt drink. I will expand this page if i try anything new with yogurt.
 
 Breakfast Parfait recipe taken from DonnaHay website. At the bottom i grind Post banana cornflakes. Add in a teaspoon of honey before pouring in the yogurt mixture. I mix in some Raspberry, icing sugar into the yogurt. I top it with Raspberry and a teaspoon of honey.

 Mixing yogurt with my banana cornflakes! Can drizzle 1 teaspoon honey for added taste.

Tuesday, October 26, 2010

How to cook poach egg recipe - the easy way!

Its really easy to poach egg. If you have google on poach egg, you will come across various detailed instruction. I followed steps by steps of their tedious and long explanation and came to a conclusion. Use a medium pot (my pot 10cm tall), hot water, egg and vinegar. Its actually very simple. Poach egg can be use from Eggs Benedict with Hollandaise sauce to matching Chinese dried mee. I have not made eggs benedict but i have tried matching it with burger meat.

 Poach egg matching with burger. A nice and light supper! Look how runny the egg yolk is!

Poach egg is not only easy to make, the egg white tend to be cook while the egg yolk remain runny! Imagine the egg yolk burst out and out comes runny looking egg yolk! Ooishi! My favorite way of eating half cook egg is to eat the egg white first then slowly move in and pop the egg yolk into my mouth. I love the sensation where the whole yolk burst in my mouth!

The main ingredient in making Poach Egg is Vinegar. Because it keeps the egg from separating when you pour the egg into the water.


 Main ingredient: Vinegar     

 10cm pot. Read on to understand why you need a medium tall pot.

 1. Fill water into the pot. Slightly higher than the egg level.

 
 2. When water boil (when air bubble start to appear at the bottom of the pot). Break egg into a small bowl. Slowly tip the egg into the boiling water.

 3. Do not stir the water. Let the egg cook for a min or two. Also do not walk away from the egg. You can add another 2-3 egg into the pot depending on your pot size.

 4. The reason you need a medium size pot! When the water boil with the egg inside, bubble will start to form. Switch off gas. Sometimes the egg will stick to the bottom. Scoop it up carefully.

Beautiful poach egg. Cook egg white with runny egg yolk.

Tuesday, October 12, 2010

Garlic Bread recipe

Good morning! I am enjoying my off day by reheating mushroom soup that i made this week and making garlic bread! Nice way to start the day with my favorite soup (in western menu) and dipping my garlic bread in the mushroom soup.

About making Garlic bread
Actually you can make the paste and store it in fridge. When you want to make bread just spread the paste on your bread and toast for 5 min (the first time/3min for next batch)
You can use butter or margarine. As for the seasoning I use the Maggi cukup rasa/chicken Maggi mee instant noodle seasoning (i kept the seasoning when cooking the chicken Maggi mee) or chicken cube (any brand). If you dont have this 3 seasoning then you can use salt. But I find that the bread taste better when you put the maggi seasoning.
Another seasoning which is optional is Oregano leaves.

How to make Garlic bread
Ingredient:
1. Garlic - Peel the skin and pound
2. Butter/marjerin
3. Maggi seasoning/salt - small pinch
4. Oregano leaf (optional) - small pinch
(Mix all together starting from 1-4)

If you only have basic ingredient at hand. You can include garlic, butter and salt.

As you can make and store it. I don't have the exact measurement as the combination of garlic and butter/margarine is to taste. I will usually use 1-2clove garlic and when stirring in the butter, i will put in 1 tablespoon at a time. When I see the butter has blend well with garlic and the garlic peaking out of the butter then its ready. Don't put too much butter otherwise you will only taste the butter flavor as it will mask out the garlic.

If garlic portion is more than butter than the taste of garlic will be too overpowering. Just spread a thin layer of butter on ur bread or add in more butter into your paste.

What bread to use?
My favorite is French loaf, bread with sesame seed on it but normal sandwich bread will do.

Method of eating the garlic bread.
I notice 2 method.
1. Toast the bread then spread the paste
2. Spread the paste on the bread then toast it.

Option 1 the taste of the garlic will be more pronounce. Option 2 ensure that your garlic is cook before eating. So it depends on you. If you are afraid of germs/contamination/hygiene/stomach upset then just use option 2.

Saturday, May 1, 2010

Curry Chicken recipe to compliment the Thosai (Part 2)

Making Chicken Curry

I wanted to make the curry to compliment my thosai. I decided to make the curry and thosai spontaneously when i found that no one cook for dinner. As it was spontaneous I tried to make do with the ingredients that I have on hand. I am not expert in making curry but the curry ended up taste great and the spices I use really enchance the flavour. Though my curry is successful it can further improve since my dad's curry taste even better than mine.

I wanted to prepare for 3 ppl. Therefore I wont be using a whole chicken. I cut down on the proportion:
-3/4 of half a chicken
4 tomato
3 potato
4 small onion and 1 big onion
2 pandan leaf/ 2 stalk of curry leaf/ fragrant leaf (not sure of exact name but its a replacement for corriander leaf according to my mum) / serai
Cilli powder/ Baba's Meat Curry Powder /
2 teaspoon of Santan and 2 teaspoon of MilkI also add 2 clove of garlic and ginger
4 Clove (Bunga Cengkih)
1 Star anise
3 Cardamon pods
1 Cinnamon

2 teaspoon of santan and 2 teaspoon of milk

The making of curry

Prepare:
-Cut the potato and tomato into quarters
-Chop the garlic, ginger, small and big onion into pcs - blend in food chopper
-Clean the pandan leaf, fragrant leaf, curry leaf and serai
-Flatten the serai. Put on the chopping board and use something hard to flatten the serai
-Once that the curry is almost ready. Lastly mix the santan and milk in a bowl and add some water

Cooking.
1. Pour some oil into kuali. Stir fry with small fire all the spices - Cinnamon, Star anise, Cardamon pods, Clove for few seconds.
2. Stir fry the mixture of onion/garlic/ginger/serai
3. Put in the fragrant leaf/ curry leaf
4. Put in the tomato, potato and chicken
5. Put in a very humble amt of cili powder - about half a teaspoon
6. Put in the curry powder. Make sure the curry powder cover the chicken adequately
Curry powder burn easily so make sure to control the fire. Overall I use medium to small fire.
7. Stir fry until its fragrant but dont burn the curry powder or the spices. If the spices burn then the curry will turn bitter
8. Transfer the whole mixture into a soup pot. Pour water till it covers the chicken. Dont pour too much else the curry will be too watery.

Cook about half hour - 45minutes. Check intermediary. Medium to small fire.

15 minutes before the chicken is ready put in the pandan leaf.

Once done put some salt to taste. Add in the santan/milk. Once we add the santan we cant cook for long as the santan can turn into oil if cook too long.

Making Thosai the easy way (Part 1)

Thosai and Curry Chicken!

I made Thosai using Thosai Mix from Lingam's

Lingam's Thosai Mix. 500gram price at RM3.40

The thosai mix is bought from this shop Rejeeta along Jalan Trus near the Indian temple and Komtar in town

I wanted to make thosai for quiet some time but I was quiet discourage while discussing about making thosai with my colleague. Out of the conversation i gather that making thosai from scratch is more suitable for large family and that the preparation have to be done overnite.

One day my Indian colleagues came back from lunch break with some of their shopping and i discovered that thosai can be cook instantly! I was overcome with excitement and my colleague kindly sold her pack to me! Its call Thosai Mix and the brand is Lingam's. It is bought from a Indian shop. Next time i will try follow them to discover where they bought it [i have posted the photo above]. Thank you Indra and Geetha for sharing with me your Thosai making as i discover something new today!

At first I did not expect much from the instant thosai mix but the taste is surprisingly tasty (yummilicious) and very close to the thosai bought from Indian restaurant!

The Thosai Mix is very easy to prepare. One pack comes in 500gram. As I only prepare for 3 ppl, I use about 250 gram. In the end I made about 9 thosai.

According to the instruction it is to mix 500 gram of the pack + 1000 litre of water and set it aside for 10 min. Pour one scoop of mixture on flat pan and spread evenly to thin round shape. Serve with curry and chutney.

The way i prepare:
1. 250 gram of thosai mix (If you have 6 members than u can use all)
2. I follow the instruction and put 500litre water but while cooking i ended up adding another 300 litre water as the mix is still too thick.
3. Stir the water and the mix till its smooth and make sure there is no lumps.
4. In order to get ride of the lumps I sieve the mixture.
5. Let it stand for 10 minutes.

Before I prepare the thosai I have cook the curry. While waiting 30 min for the curry to be cook I prepare the thosai.

6. Heat the pan. Cut an onion into half. Use fork to poke it and use it to oil the pan.
7. Use a scoop - the kind that i use to scoop out soup - take out a scoop and pour slowly on the pan.
8. Wait until the bottom is brown. The top will remain white. It takes a few tries to judge when its cook. Fold it in half and ready to serve. Make sure dont turn it to cook.

Some pictures for illustration:
Set it aside after mixing the Thosai Mix and water

Poke the onion and oil the pan by circling it round the pan

Required Utensils: Flat Pan and Palette Knife

Pour one scoop of the mixture onto the flat pan

I will show how I made the curry in a second part. Combining both will make the post look too long.

Related post:

LinkWithin

Related Posts with Thumbnails